
Did you know that you can give your team and accountant access to your QuickBooks Online company file with controlled permissions?
You can add users for reports and time tracking only without jeopardizing your financial data. Continue reading to learn how to add users in QuickBooks Online.

Log into QuickBooks Online.
Navigate to the Gear icon, and click on Manage Users under the Company section.

Click the New button to add a new user.

Choose the type of user you want to set up then click Next.
The standard user gives you more flexibility to designate the specific areas of QuickBooks Online a user can access. This option is best for your accounts receivable and accounts payable teams. This user type counts towards your QuickBooks Online user limit.
Reports only user is best for giving your management team access to your financial data without the ability to edit the data. This user doesn't count toward your QuickBooks Online user limit.

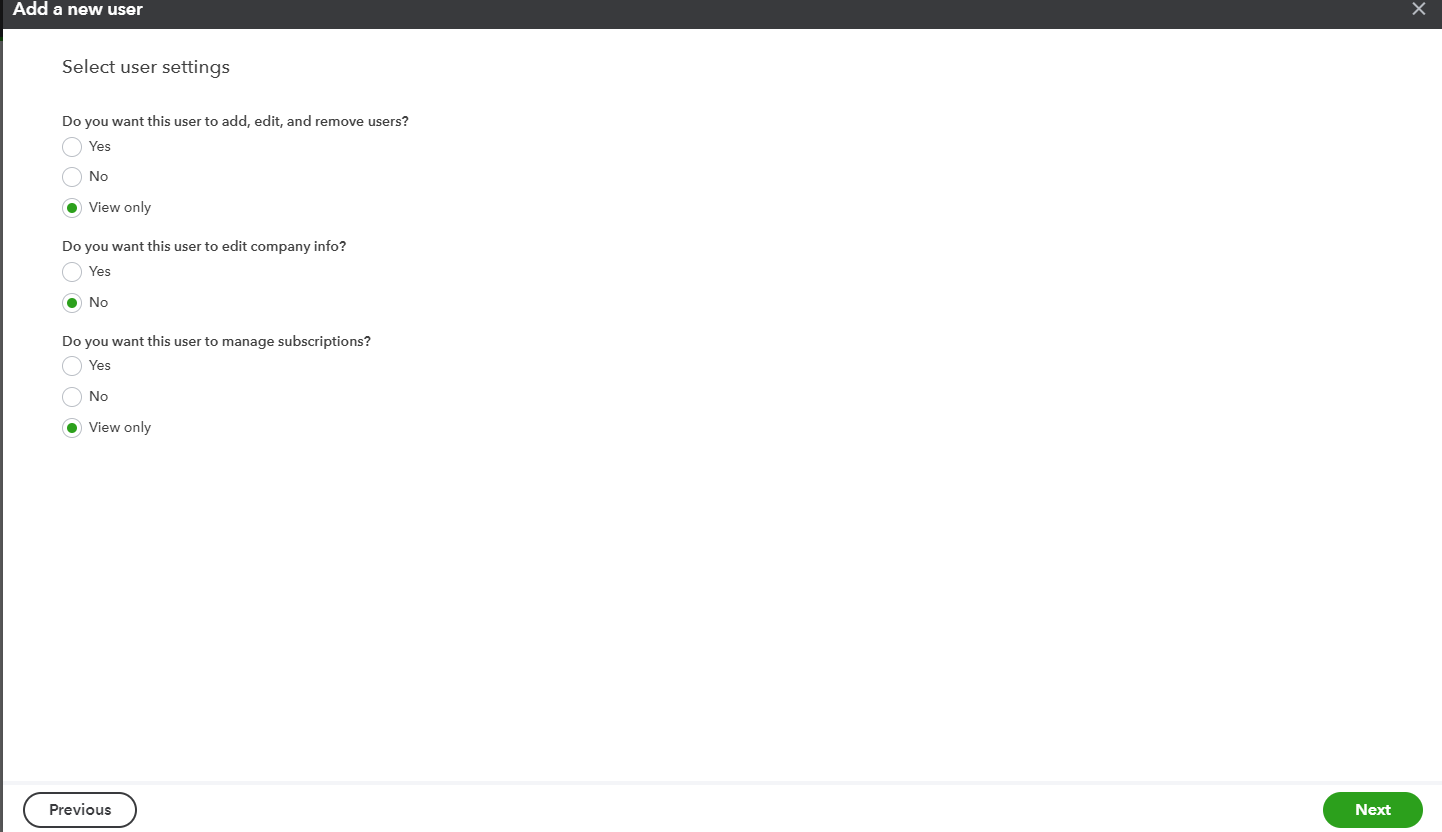
Select the user's access rights then click Next.

If you selected a Standard user above, you need to select the view-only option to prevent the user from being able to change your company file settings.
Enter the user's email address and name, then click Next.

Click Save and you are done. The user will receive an email that contains a link to sign in to your company file. If this is their first time using QuickBooks Online, they will be asked to create a user ID.
As the admin of your organization, you will be able to see the status of invited users on the Manage Users page.
Contact us for more QuickBooks Online help or schedule a private one-on-one QuickBooks training session.